Tuesday, January 31, 2012

Resolutions and a new tool

At our last local guild meeting we talked about quilting resolutions for this year, and I thought I would publish mine here for extra boasting when I finish them accountability.

1) Get my sewing machine serviced   DONE! (Saying this was a resolution made me get off my butt and do it right after the meeting.  The feed is greatly improved.)

2) Reduce my UFOs by 5 by the end of the year.  (I tried to count UFOs and came up with 14.  Then I counted again a few days later and came up with 8.  I just made a list right now and came up with 11.  So forget how many I have right now.  Basically I have to finish 5 more things than I start this year.)

And additional resolutions that I didn't share at the meeting:
3) Buy less fabric than I use.  I am instituting a 2 yards out, 1 yard in policy on account as of just last night finally breaking down and expanding my quilting fabric into yet another drawer.  I have a tendency to gather up sets of fabric and then call them an intended quilt.  Next I find someplace to hide them so that they no longer count as part of my fabric stash.  Like... in a stack hidden behind another stack.  In my WIP drawer.  Inside of a shoe box.  In a pile in the dog's closet.  (These are REAL hiding places, people.  I'm not kidding.) Anyway, I gathered those all back up and put them away, and the drawer-space situation is dire.

I told you it was for real.  That's the dog's closet.  And a shoe box.  Also this is after I cleaned up.
 4) Sew 6 items of clothing, or 1 every 2 months.

Now don't be surprised if I play pretty free and loose with these resolutions.  For example, free fabric doesn't count towards my incoming fabric, but if I use it it counts toward my outgoing fabric.  I am grouping WIPs and UFOs together, and finishing either counts toward my goal of 5 (and as outgoing fabric!)  Technically I made my resolution at the beginning of the month so I am already counting finishes and I am up by 2 already, woot!

Also at the meeting, another MQG member turned me on to the Chaco Liner from Clover.  It's like a chalk pencil... but magical.  It dispenses chalk-ish powder over a roller wheel (like one of those whiteout dispensers) so unlike a chalk pencil, you don't have to push hard to make a nice line.  That means that on your stretchy or thin fabrics, you just zip down next to your ruler and don't have that bunching/skipping problem.  When you're done with the line, flick it a few times with a fingertip and the chalk bounces right off the fabric.  I used it the other week to mark the hem on my Taffy Blouse, and it worked great.


Speaking of the Taffy Blouse, I wore it last week.  I used my brains to get around how light the blouse is for our winter weather... by wearing pjs under my pants.  Yeah, I was double-pantsed that day and nobody knew.  Except for me, since I was toasty warm.  I was asked if I got the shirt from Modcloth... and by another person if I had lost weight.  Success, my friends. 


I leave you with a picture of our poor dog, who broke a tooth.  (Who knows how, but the Dog Dentist told us not to let him chew ice anymore.  Aaaaagh!  That's like his favorite thing ever.)  He had to be put under for a few hours to get a root canal.  Afterwards he was totally out of it all evening due to lingering sedative.  It turns out that dogs greatly dislike being high.  He spent hours either staring into space with his tongue out, nodding off sitting up, or wandering around crying sadly (we call it crying when he whines because it sounds cooler (but maybe that's just me)).  He appears to be 100% recovered from this now, so don't fret yourselves.

Monday, January 30, 2012

Charity Quilting

Deborah and Jennifer, the awesome charity coordinators for our local Modern Quilt Guild, are organizing different charity quilt projects for us each quarter this year.  The first quarter project is  based off of Amanda Jean's postage stamp quilt-along last year.  They actually created cute little block kits for us all with little pre-cut squares!  Man, what a great idea.  I just pick up a few at the meeting and it is super easy to whip them up.
I got so jazzed about the project that I also offered to quilt up some of the finished tops.  Jennifer already had a set of blocks for me at the sew day last week so I came home and sewed 'er up!  The quilt is for the Lucile Packard Neonatal unit, so it is only 36" square.  The small size gave me the opportunity to be bold with the quilting pattern, so I brought back a pattern that I used two years ago for a quilted shoulder bag

Basically you just start at the edge and start quilting in any old direction, curving any old amount, and continue until you get to the opposite side.  Keep on going like that until you think it has good coverage.  I looked over the top at intervals looking for un-quilted areas that were too big to leave alone, and then I would aim for them from the edge.  In case you were wondering... it is F.U.N.  You basically can't mess it up.  Plus, I'm off the hook for doing a binding - I just pass it along!  How's that for awesome?

Friday, January 27, 2012

Kona Solids Challenge

I started this quilt last year in a sponsored challenge from Robert Kaufman through the Modern Quilt Guild.  We were supplied with Kona Solids Charm Packs to make a quilt all in solids.  Our local guild ended up getting the brights pack, which was great because that would have been my pick anyway! I used every piece in my charm pack, counting a grey and a white square that both ended up on the back.  Embarrassingly, this challenge was due around July or August of last year, and I just finished it this week.  Woops.

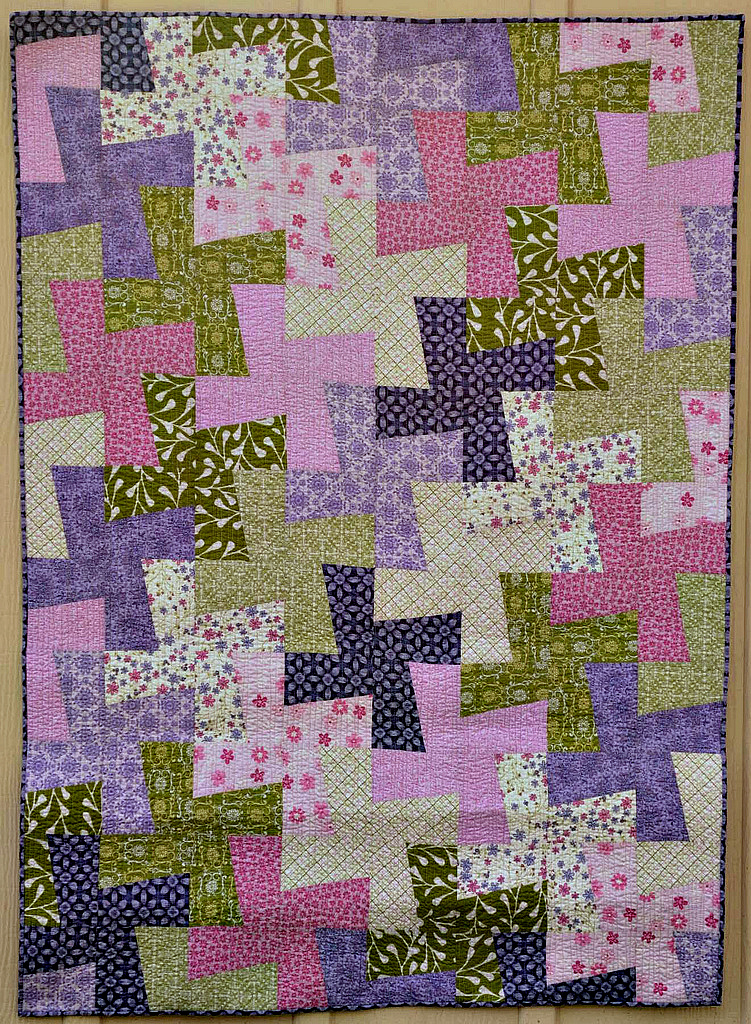
I really wanted my colors to flow from one to another to take advantage of the rainbow of colors in the charm pack.  I ended up going with this layout, which I liked best for the colors, but as I finished the quilt I started to like the layout less and less.  I'm not sure it really makes sense to me. However, I think that the block has some awesome potential in other layouts as well.  I started this design based on a whirly-gig block, and I thought it would be a bit cool and funky if I cut a freehand curve on each piece instead of a straight line.   I call this quilt the "Two Margaritas Quilt," after my mental state when I came up with the block idea... 


I used the method described here to do the curves.  If you decide to make a block like this, make a note that you really should start with rectangles that are 1/2" longer on one side.  That way, after the seam you will have a square without having to trim a bunch of fabric.  Since I was using charm packs, I cheated on this by adding 1" length to my grey fabric.  It's not obvious, but overall the blocks are a bit more than half grey.  Neat, huh?


My favorite part about the quilt is definitely the quilting, which is done in echos from the edges between the color and the grey.  Where my echos came together, I improvised little funky designs that turned out really fun.   In the end, the quilting probably wouldn't have happened without the odd layout I chose, so I have made my peace with it!  I will definitely be doing quilting like this again in the future, but I'll stick to small quilts for it because the constant turning is SUPER irritating... the reason it took me 8 months to finish this little guy. 


A big thanks to Robert Kaufman for sponsoring this challenge and to the Modern Quilt Guild for organizing everything!

Sunday, January 22, 2012

Taffy Blouse Finished!

After 2 muslins and a million ripped seams, it's done! The muslins were worth it though, because I love how the fit turned out.  I ended up doing an FBA, moving the darts, and re-drawing the side seams (which were almost straight) so that it tucks in a bit more at the waist.

I used a dark purple synthetic shear mystery fabric for the main body.  Being flimsy and slick, it was a little tough to cut out so I traced the pattern onto freezer paper and ironed it to the fabric.  That stabilized half of the outline, and I folded other half over top of the paper and cut it out with a rotary cutter.  It would have been easier if my starting piece of fabric had been smaller - as it was, it kept sliding off the sides of the table and pulling everything wonky.  I got through it though, the sewing was surprisingly easy, not even too much fraying.  

For the bias bindings, I used a lightweight greyish-blue fabric that seemed to be natural fiber.  I had a hard time folding the binding because I had cut it just barely to size, and with the stretch on the bias the width tended to get smaller.  Next time I will cut 10-20% over-size if I have a light fabric like this. 

Both fabrics were in my stash from a craigslist score a few years ago.  The blue with the purple isn't the a stellar match, but it does look better in person than in the pictures.  It was the best option that I had on hand because of the drape.  I think it is really important for this blouse for your bias binding to be similar in drape to your main fabric.  If your binding is too stiff, it wants to stay straight instead of curling in and out on the sleeves.

This pattern is less fitted than something that I would normally pick to sew for myself, but I really like the result. I am convinced that it will get a lot of wear once summer rolls around. There are only 2 things that I will change on the next version (and there will be a next version - DH says it would look good in black). First, the neckline/shoulders ended up a little broad. I shifted my bra and tank straps out for the pictures, but normally they tend to show, so I will take some width out at the shoulders.  Second, which you can't see because I pulled it straight for the pictures, is that when I move around it tends to develop a kind of sagging/smile wrinkle that goes from the sides at the waist to the front middle below my belly button.  I have no clue what to do about this, although I suspect that it comes from curving the seams in at the waist.   The weirdest part is that I think it was worse before I hemmed the bottom. Anybody cured this before?

All in all, I'm so glad I made this, and I really do recommend the whole book. For one thing, the instructions for the patterns are excellent. The diagrams  are clear, and the techniques are all explained right there in the book.  For this pattern, the main techniques were creating and using bias binding and sewing french seams. I did double-check on the Colette Forum about the finished size of 1/2" double fold bias tape (which is 1/4". Damn whoever came up with that one!) The approach that the book teaches of going slowly and focusing on the quality of your work, combined with the clear and easy instructions, helped me achieve something that I think is the best clothing item that I've sewn so far.


Wednesday, January 18, 2012

The Whirly-Gig Quilt

This quilt is from March of last year... I made it for a friend's baby shower, using my standard surprise-color-selection method of peeking at her shower registry and trying to match the bedding colors.  The pattern itself I did by educated guess and it turned out just fine.  I had to cut all the pieces out and arranged them on my table and then carefully sew/layout/sew/layout the whole thing because of the way the squares contribute to the overall design.  That is such a pain, right??  So, ok, maybe you always have to do that, but usually you are laying out 10-12" squares, and these were only 6".  I didn't have a design wall back then and it was fairly miserable as a result.  Maybe if you buy a pattern there is some magical way where you stack them up all the right way and then cut here and sew there and then unfold the finished top like a string of paper dolls. 

 
I did varied-width "downhill straight line quilting" on this quilt.  That's where you mess up your machine settings and the quilt top gets dragged down relative to the back and the whole top ends up slightly cockeyed.   It's one of my favs!  (Going by how many quilts I use it on...)

Also, I bought almost exactly double the amount of fabric that I actually needed, as usual.  Is it so terrifying to think of being a few inches short of fabric that I actually need to double my estimates?  I should start trying to think of it as a delicious challenge to make it work if I'm short on fabric.  Live on the razor edge.  Life would be more exciting, no?

Sunday, January 15, 2012

Taffy Blouse

I love Colette patterns.  They're beautiful.  And I expect that they would be pretty easy to fit to my body shape... if I ever got around to sewing any of them.  The thing about sewing clothes, though, is that it's HARD.  Depressingly hard.  You have to do things like... seam finishing.  Pattern grading.  Sewing muslins (because I love sewing things and then throwing them away).  Worst of all... unpicking.  And crappy unpicking at that.  The kind where the fabric falls apart just from LOOKING at a seam ripper.

 Enter the Colette Sewing Handbook, which I got for Christmas.  Whereas I never actually have opened any of the Colette patterns that I've collected, I actually opened the book and read it.  In doing so, I noticed something lovely... the instructions are soooo simple.  When I read through the pattern, I understand everything.  There's never an illustration where I'm like "whaaat?  Maybe I'll understand that part when I get to it"  (ha!)  Plus, since it's a book format, she is able to explain every technique used in the patterns, so you don't even have to look anything up online.


The end result is that I got tricked into making a shirt.  The Taffy Blouse, to be exact.  It turns out that easy instructions only make sewing garments about 10% easier.  I've unpicked this thing about 6 times (including one where the darts were somehow on the outside of the shirt), but one of the times I actually got close enough to finished to see what it would look like.  I asked my husband what he thought and he said "I like it."  !!!! !!!!   !
Hold on... you might not understand.  "I like it" is pretty much the maximum rating that DH gives.  Things of average to excellent goodness, like homemade raspberry jam, get the "it's ok" rating.  The "it's ok" rating means "I will finish this jar within a week because I can't stop eating it."  Things that get the "I like it" rating include: me, cars, the dog, and the internet.  So for that to get applied to a mere shirt... well, that is inspiration to get me through another round of unpicking the durn thing.

Wednesday, January 11, 2012

Poor Blog and an Emmeline Apron

My sister called me up the other day to tell me, haughtily, that she was DELETING my blog from her shortcuts bar.  Reason: no posts for an entire year.  Blog, I treated you bad and I'm sorry.  No particular reason, except maybe a crafting enthusiasm that precluded spending time on things like taking pictures for the ole' blog.

So, just for her, here's one from the last year.  I used the Emmeline Apron pattern from Sew Liberated to sew up birthday presents for each of my sisters.  My youngest sister sent pictures of hers... modeled myspace-style for the mirror (including kitchen utensils in the pocket!)

I put the little pocket on one side of the apron - and on this apron I stupidly did it AFTER I had assembled the whole apron and creating a lot more work for myself. I ended up ripping the topstitching on the bottom hem and then arranging things so that the opening was under my presser foot and all the fabric was bunched around. If that didn't make sense it's because it was a stupid plan (I shouldn't even use the word plan as this implies that I was actually thinking...).  For all the following aprons I had the good sense to put the pocket on before assembling the front to the back.  The embroidery design (it's a shark, not a pissed off walrus) is compliments of my niece, who made a special drawing for each of her aunts.

I have a few suggestions for anyone who is considering the Emmeline Apron:

Bust Adjustment: Although the style of the bust is looks very forgiving, on larger busts the under-bust accent can disappear, making the apron look a bit blah.  On smaller busts the gathers give you a bunch of extra fabric hanging about and make you look smaller.  Since it's really easy to do, it's a good idea to go ahead and adjust the bust - measure yourself from just below your bust (where your bra band sits) to the top of the bust or where you would like the neckline of the apron to lie. Increase the height of the bust piece so that it is the same as your measurement. If you make a pretty big change, measure horizontally as well to make sure that will work out.  You may want to increase the length of the bias strips to match your new height, but they were plenty long for me without adjustment.

Waist ties: The instructions for this are completely guess and check. It's ridiculous and took me 15 minutes to do the first one. For the second one I just copied the first one and it was perfect from the get-go. So - start by measuring 1" from the end of the apron tie, along the bottom (shorter) edge. Mark a diagonal line from that point to the corner of the tie. Align your mark with the edge of the apron, pin and check. This should give you a fairly good result, although you may want to adjust it slightly.
 
Apron reverse side, using angled darts

Bias binding/Neck tie: Looks cute but the knot at the back of my neck was annoying. You can replace the tie with a single strip that slides over you neck. Drape a measuring tape over your neck and measure to just below your bust at the sides, near but not quite under your arms. Add 1" to this measurement to get the total length that you need for your bias strip, then just follow the directions in the pattern, using the ends of your single bias strip instead of one end each of two strips.

Example with straight tucks


Apron Front Tucks: I didn't like the straight tucks in the pattern because I think they looked unfinished, so I changed them to angled darts.  Basically, I just added an angled line from the end of the pattern dart off the side of the pattern, making it about 3" longer.


Look how much sleeker the dart is!  I, for one, don't need any lumps added in around my waist...


So there it is!  And I'm officially back on the horse, folks.